


Reports are the backbone of effective collaboration. They unify, synthesize, and summarize information, effectively bringing order to what may seem chaotic in a bunch of Confluence pages across your team spaces. So, understanding how to get started with Confluence reports is crucial to establish a solid foundation for your team’s reporting efforts.
If reports are a Confluence native feature you would like to explore in further detail, then this article is tailor-made for you!
We’ll dive into Confluence reports shedding light on their importance in seamlessly enhancing your Confluence journey and revolutionizing content management within the platform.
Capture and Display Key Information with the Page Properties Macros
The page properties macros are designed to help you capture key information from multiple Confluence pages. The key information to be captured include page statutes, action items, dates, mentions, and more. These macros are particularly useful to streamline collaboration between multiple teams and help project managers grasp the bigger picture.
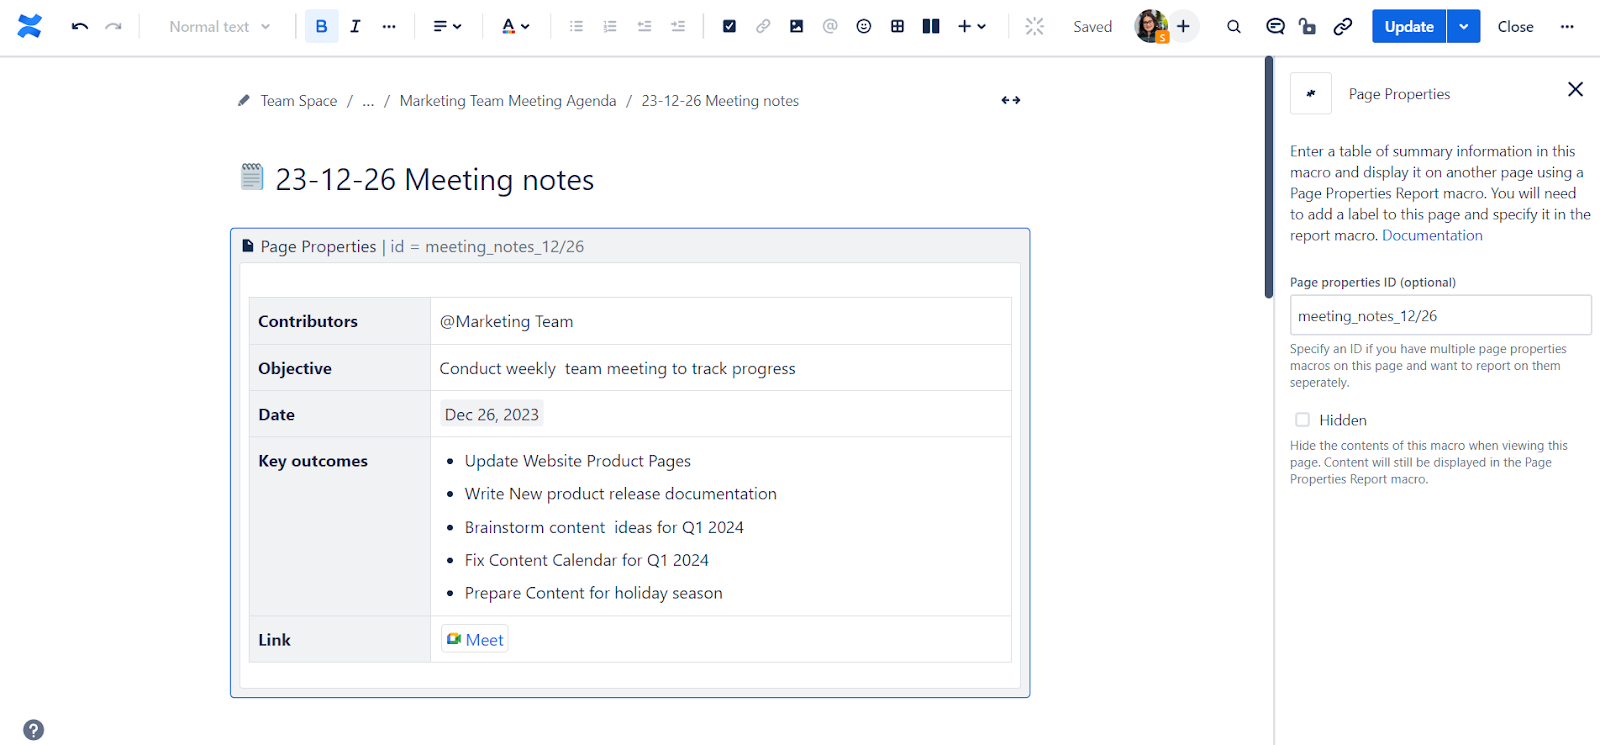
Both macros work hand in hand. First, start by adding the Page Properties macro to your Confluence page. For this you can include a table within the macro along with key information you want to use as an overview of your page.
In our example, we highlighted important takeaways from our team’s weekly meeting such as Contributors, Date, Meeting Objective, Key Outcomes, etc. We’ve also set our page properties ID to “meeting_notes_date”.
You can, of course, customize information you want to relay in your page properties macro depending on your Confluence page content.
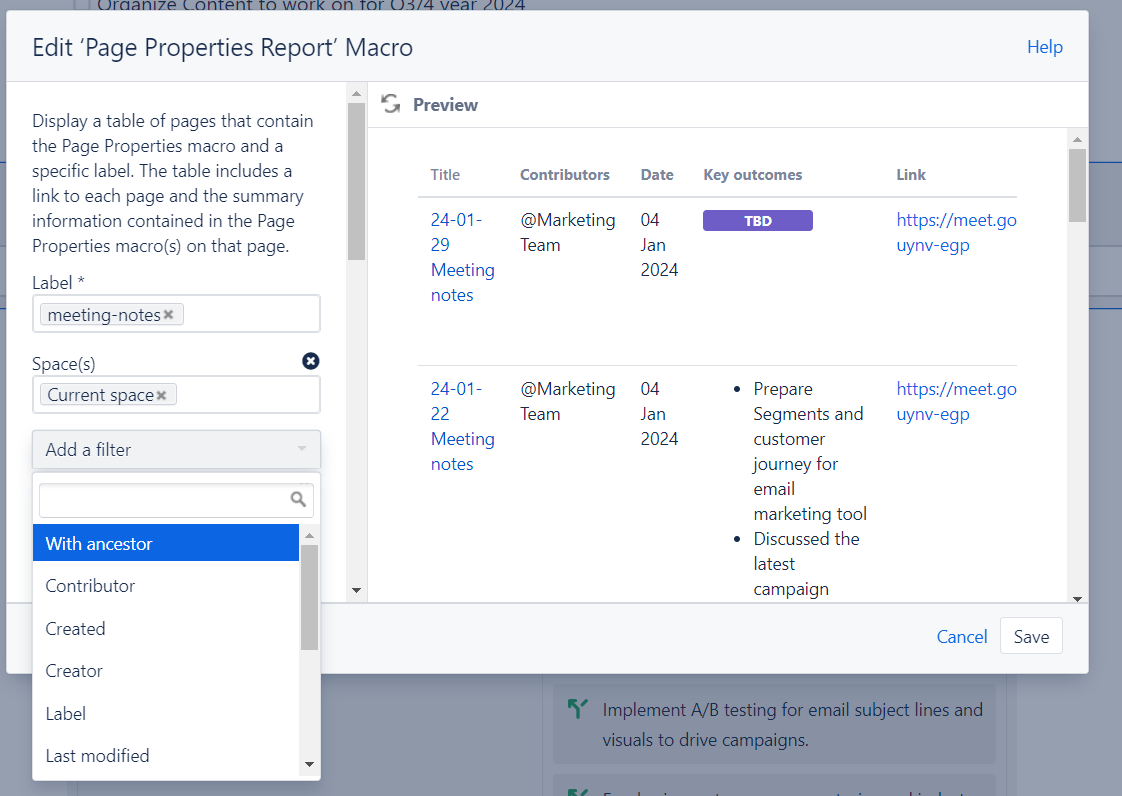
Now that we’ve included the page properties macro within our Confluence pages, it is time to create custom reports with the page properties report macro.
The macro can be used within a parent page to showcase important takeaways from multiple Confluence pages.
In our example, we’ve created a dedicated team meetings report where all meetings are compiled. The rows indicate each meeting note while columns include the macros and values we’ve specified.
This way, all team members can stay up to date with key information without having to toggle between pages, saving time and enhancing productivity.
You can, of course, edit the Page Properties Report macro to include more than one label used in Confluence pages, filter using Label, Creator, Date, etc.
👇Check out our Confluence tutorial video to learn best practices to use page properties and page properties report macros:
Display & Classify Content with the Content Report Table
Confluence has a host of features dedicated to help you structure content such as blogs, page trees, and more. However, more often than not, teams want to centralize all content within a specific Confluence page. This is when content report tables come into play.
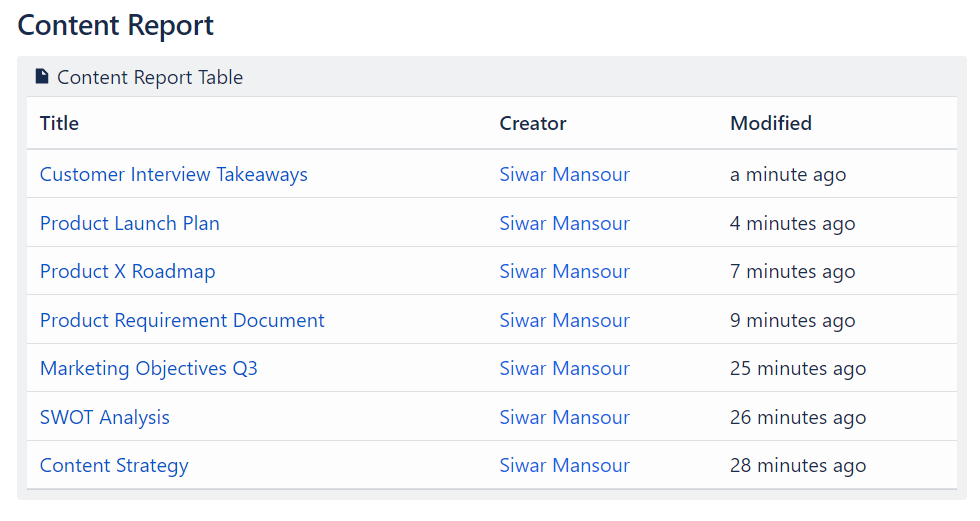
Simply put, this report groups all created pages within a given Confluence space. This is particularly useful for teams continuously working on content such as marketing, technical writers, etc.
To insert the report, type /content report table in edit mode. Within the drawer select the space(s) from which you want to display content and specify the content label. You can also choose how to sort pages as well as the maximum of pages.
Once you finish, click Publish. The report will be generated according to the display options you’ve specified and include three main columns: Title, creator and the last modification date.
👉Learn about more Confluence intuitive macros to grow your communities
Oversee Tasks across Your Confluence Space with Task Report
You now have an overview of content and key information shared across your space in one summary report page. But how can you keep track of actions and tasks detailed within your meeting notes?
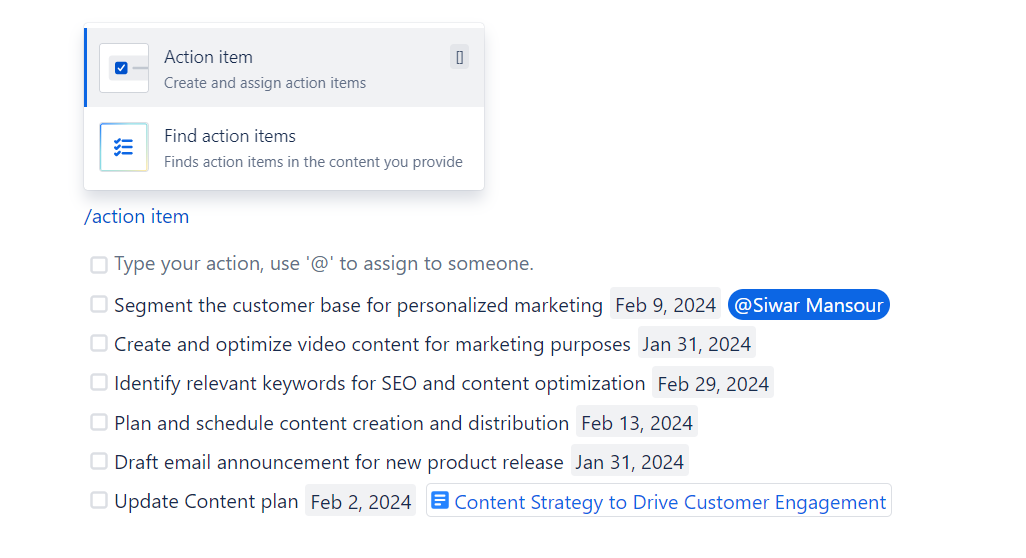
Well, this is precisely what the Task Report is for. But first, you need to use action items across your Confluence pages to be able to effectively build your task report.
Start by creating Tasks. Navigate to your desired confluence pages, type /action items to provide task details and other relevant information.
Once you’ve defined your tasks, establish a new parent page to act as your “Tasks Dashboard” or navigate to an existing “dashboard” page.
Use the /Task Report command, and complete the macro’s required fields.
Select Space or Page, you want to retrieve tasks from, specify label, select based on assignee, date, etc.
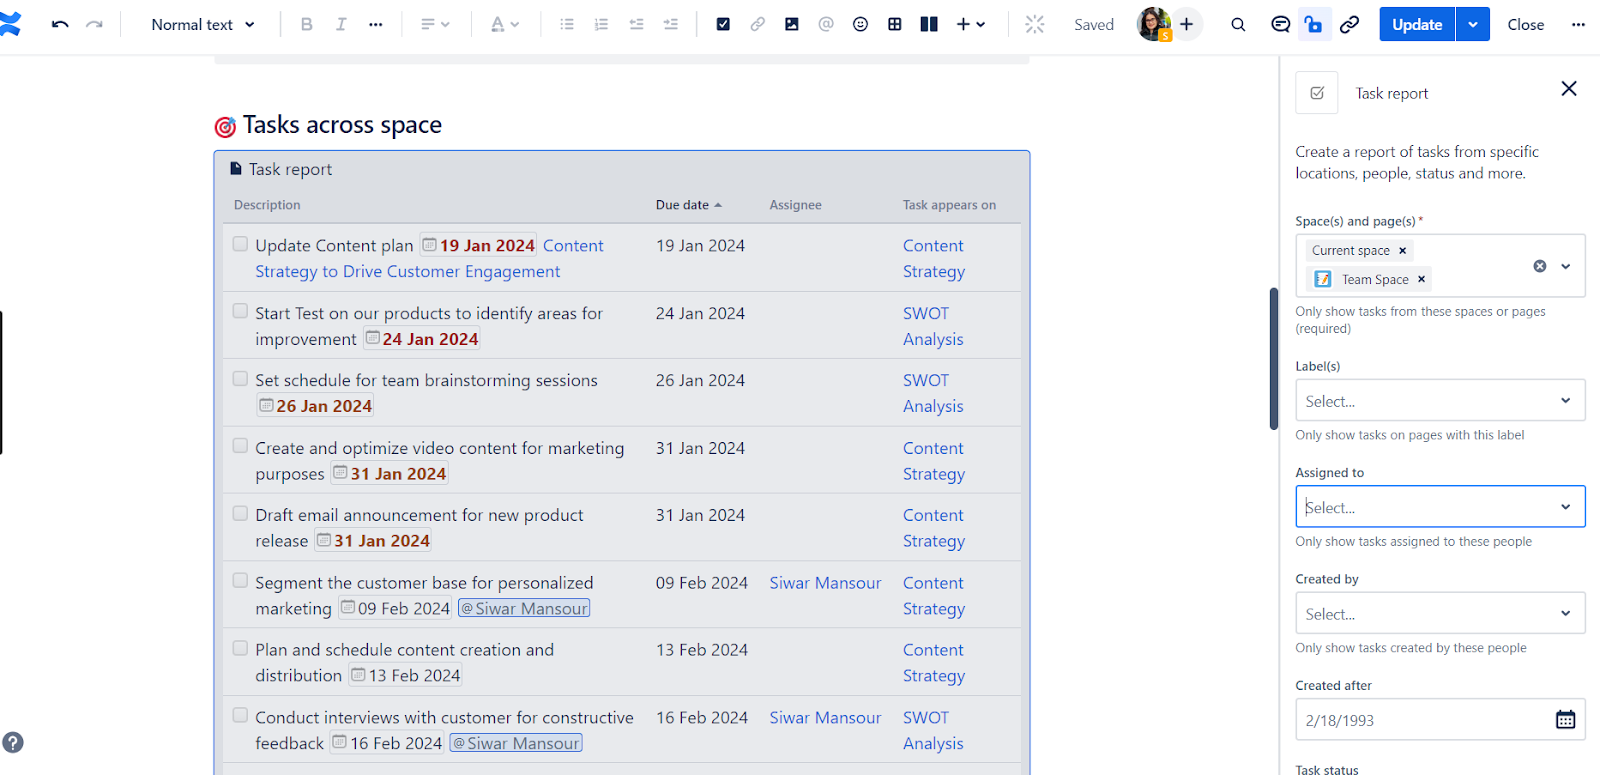
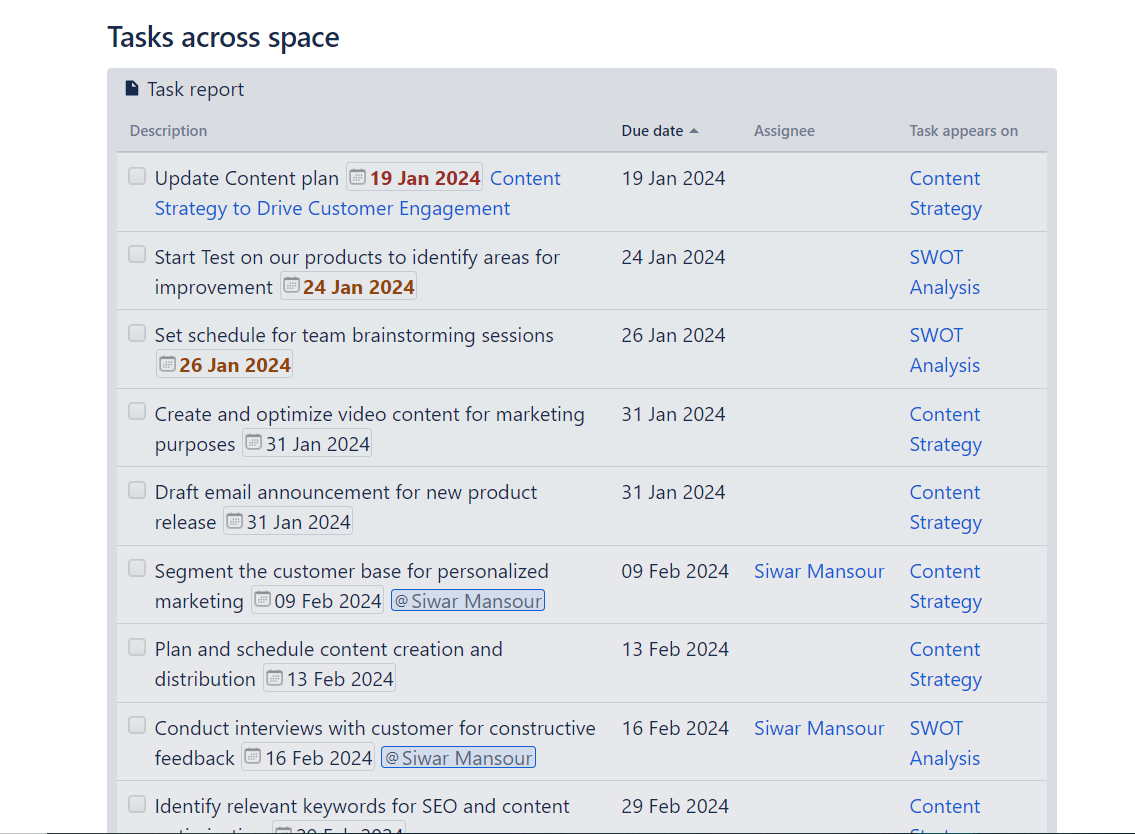
You can list and track tasks based on various criteria including the Space, Assigned to, Date, Task Status, and more.
This is specifically useful for project managers to oversee work progress.
Showcase Important Decisions with Decisions Report
We’ve covered how to capture key information, content, and tasks set across your Confluence space in simple table formats for easy access and overview.
Now it’s time to oversee important decisions set in different Confluence pages. To do this, use the Confluence native Decisions Report macro.
Keep in mind that you need to use the decision macro beforehand to be able to report them using this macro. Use /decision and input your text.
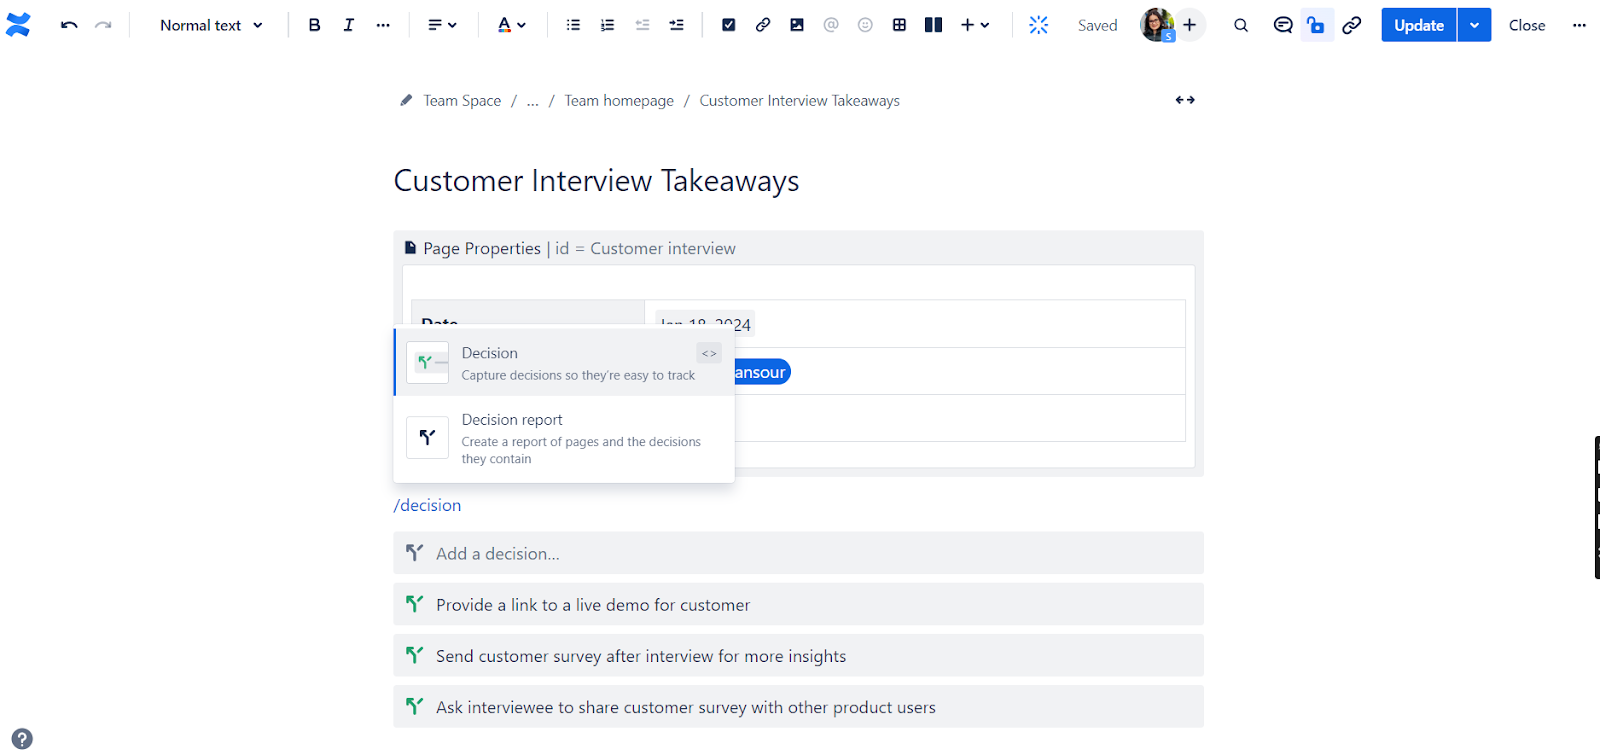
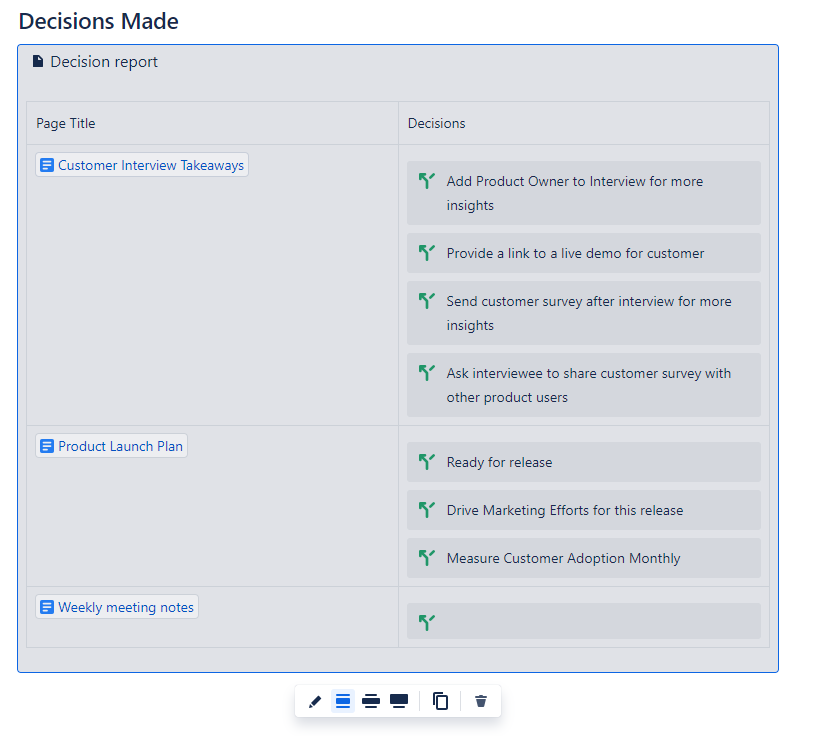
Next, include your decision report macro in a new report page. Type /decision report in edit mode to showcase all your decisions summarized in one single table.
The report macro will include all decisions set across your Confluence space by default. But, you can edit your report table display to suit your preferences.
Click “Edit”, and specify your Confluence space. Add Filter to your table to facilitate your search. You can filter decisions by “Creator”, “Label”, etc.
You can further customize the layout of your decision report using as illustrated in the screenshot below.
This Decision Report table provides access to all pages within the space containing decisions, neatly organized for easy reference, including lists of decisions in each page.
You can refer to this Atlassian Documentation to use the Decisions Report macro the right way.
Confluence native report macros are essential to help you facilitate access to key information and make better informed decisions.
In this blog, we’ve only covered the native Confluence report macros. it’s important to also point out the seamless integration possibilities for Jira Reporting within Confluence, using macros like Jira Issues/Filter Macro, and Jira Status Report Template.
Stay tuned, as we’ll be sure to explore these macros in more detail in upcoming posts.
👉Check our dedicated YouTube playlist for more Confluence tutorials