


As a new employee, walking into a new office or starting your first day at a new job remotely can be overwhelming. However, a proper onboarding kit can set the tone for a positive and productive journey. Effective employee onboarding is crucial for the success of any organization. But, the process can be daunting, especially for larger organizations with a high volume of new hires, or a digital workplace. So how do we get these important steps in an employee journey right?
Fortunately, Jira offers a solution. By creating a unified onboarding hub, you can streamline your Jira onboarding process and ensure a seamless transition for new employees. In this blog post, we will explore how Jira excels at doing exactly that.
Establish your Objectives
To ensure the success of any process, it’s important to define your goals right from the start. A common corporate objective is to facilitate the integration process, after all your new employee is bound to be anxious and uncertain.
A new job, unfamiliar faces, and the fear of not meeting expectations can add to the pressure. By setting clear goals and objectives for the onboarding process, you can ensure that new hires feel welcome and are ready to contribute to the team.
Create your Onboarding Project
Now that you have set your objectives, it’s time to start building your hub. As a first step, create a new project in Jira and you can consider selecting the HR Onboarding project template.
This template includes an Employee issue type and a five-step workflow to give your team a place to organize all onboarding tasks.
Let’s walk through the Jira onboarding template’s main components:
Summary:
Within the summary view, you have a detailed overview of your onboarding process. This includes a brief description of your onboarding process in Jira, team members involved, and status overview.
Some key actions:
- Status overview: Progress of your project based on the status of each item.
- Recent Activity.
- Priority Breakdown: Holistic view of how work is being prioritized within your project.
- Types of work: View the breakdown of items by their type
- Team Workload: Shows Assignee, Their work distribution, and tasks count.
- Related Projects: you can attach projects relevant to the onboarding process such as a Project designed for organizing training.

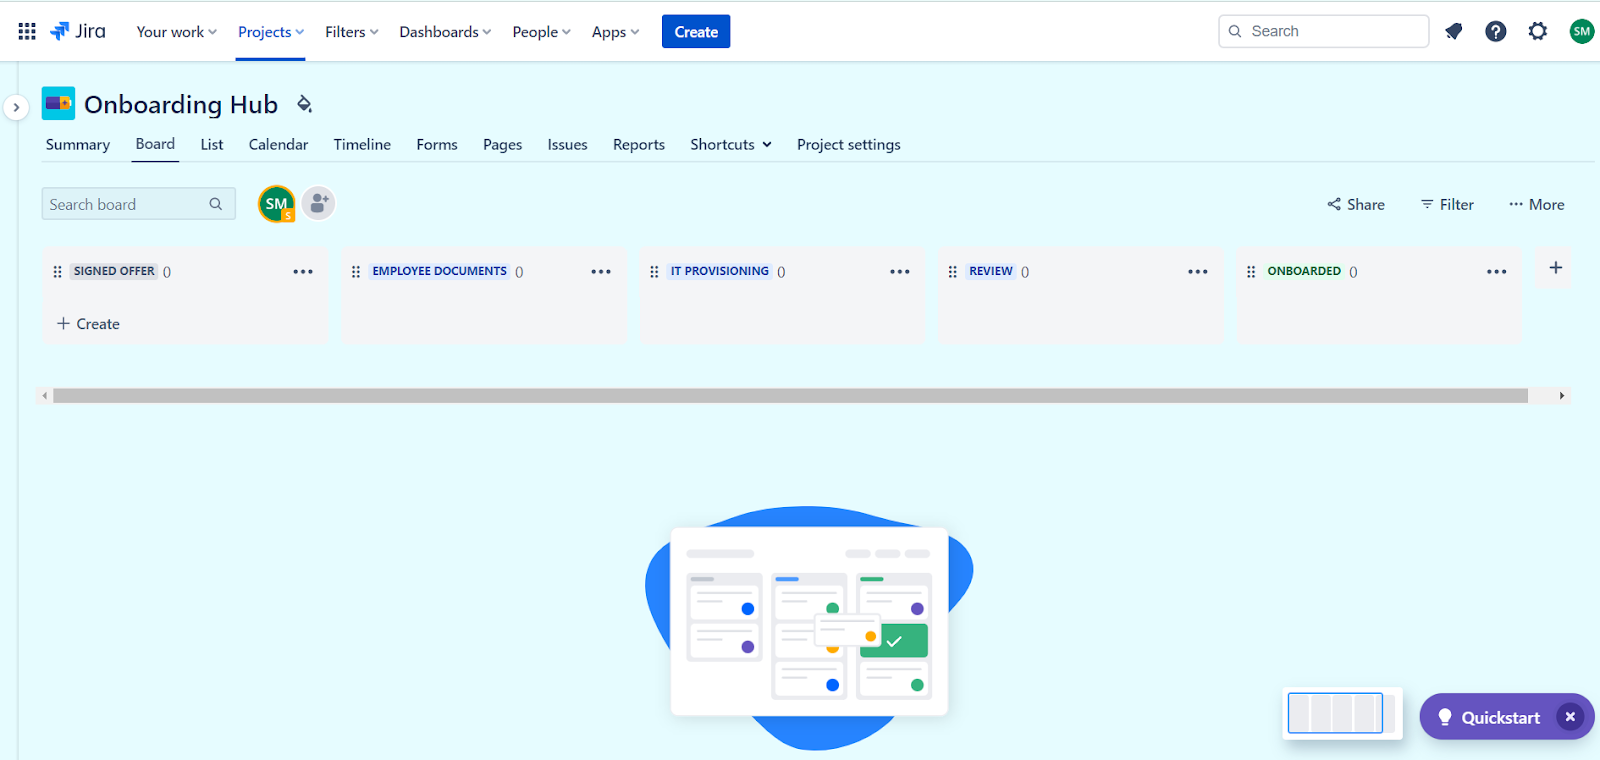
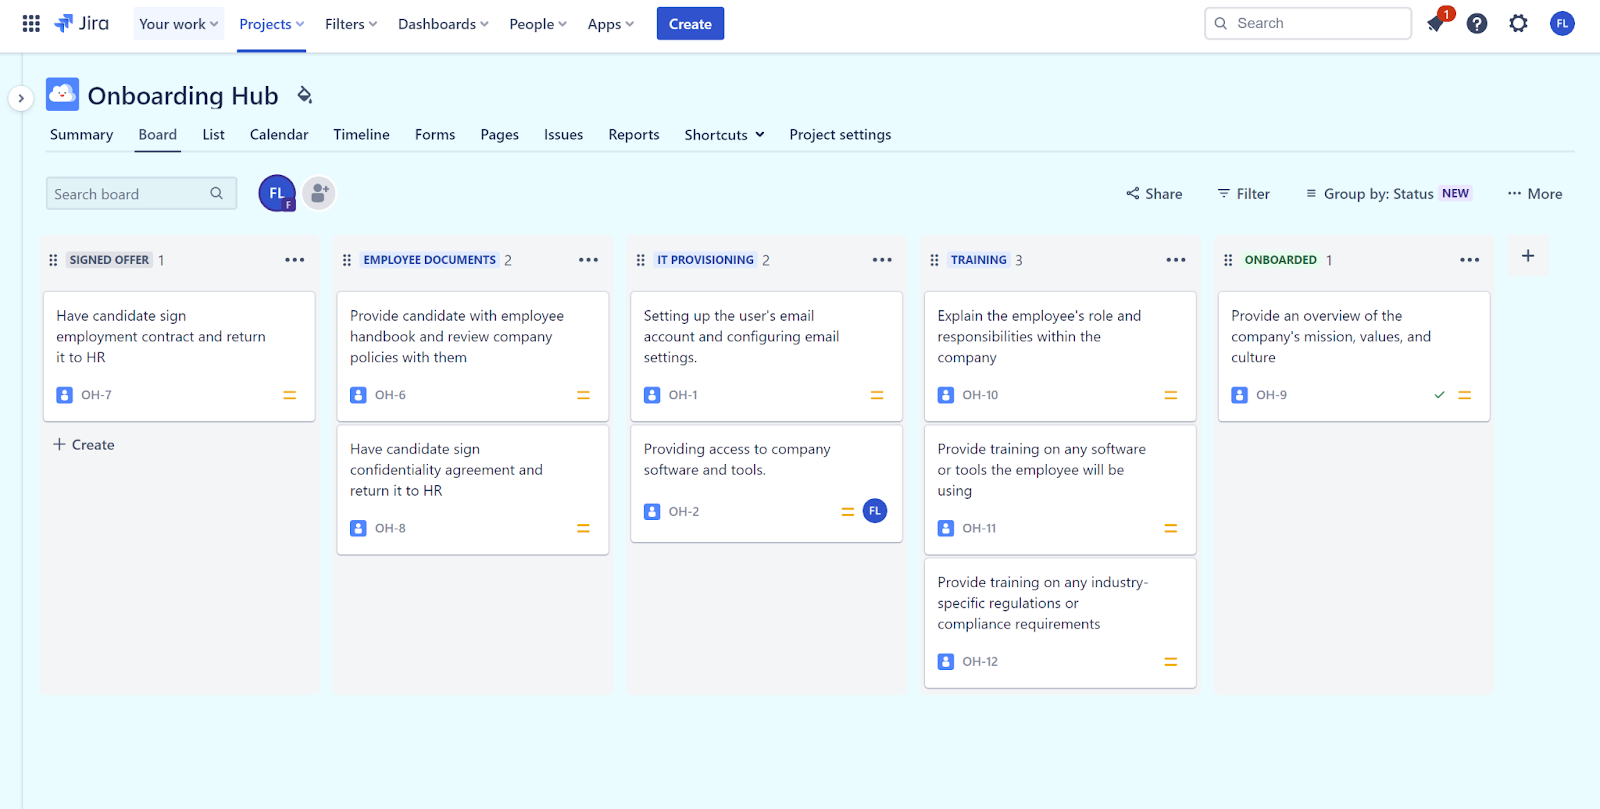
Board:
The board overview is a visual representation of Jira onboarding process, where each issue is represented by a card and associated with a given step.
Some key actions:
- Create issues: You can create issues within each step of your onboarding process by clicking “Create”. You can later, move issues freely within the board view.
- Create steps: To add more steps to your onboarding workflow, click “+” and give the step a name. The latter will be immediately added to the workflow.
List:
Similar to the board view, the list view allows you to visualize and manage your Jira onboarding workflow. Issues are listed with a short summary, statutes, categories, assignee, reporter, due date, and more. You can add more issues by simply clicking “Create” at the bottom of the table.

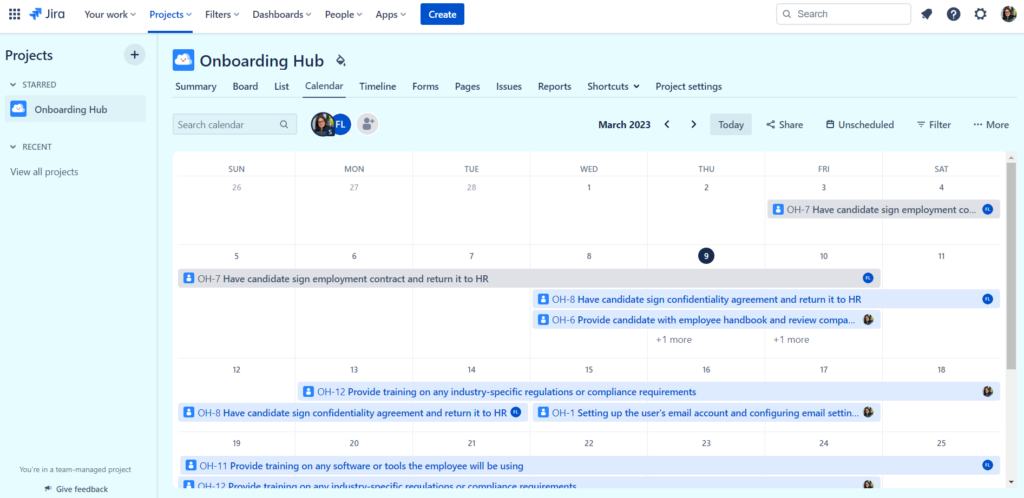
Onboarding Calendar in Jira:
Calendar feature helps you visualize deadlines, events, and milestones of onboarding in Jira. You can mark your important dates like start dates for your new hires, training sessions, events, and keep them up-to-date.
Some key actions:
- Share the calendar and attach a message
- Filter by Assignee, Priority, Labels, etc..
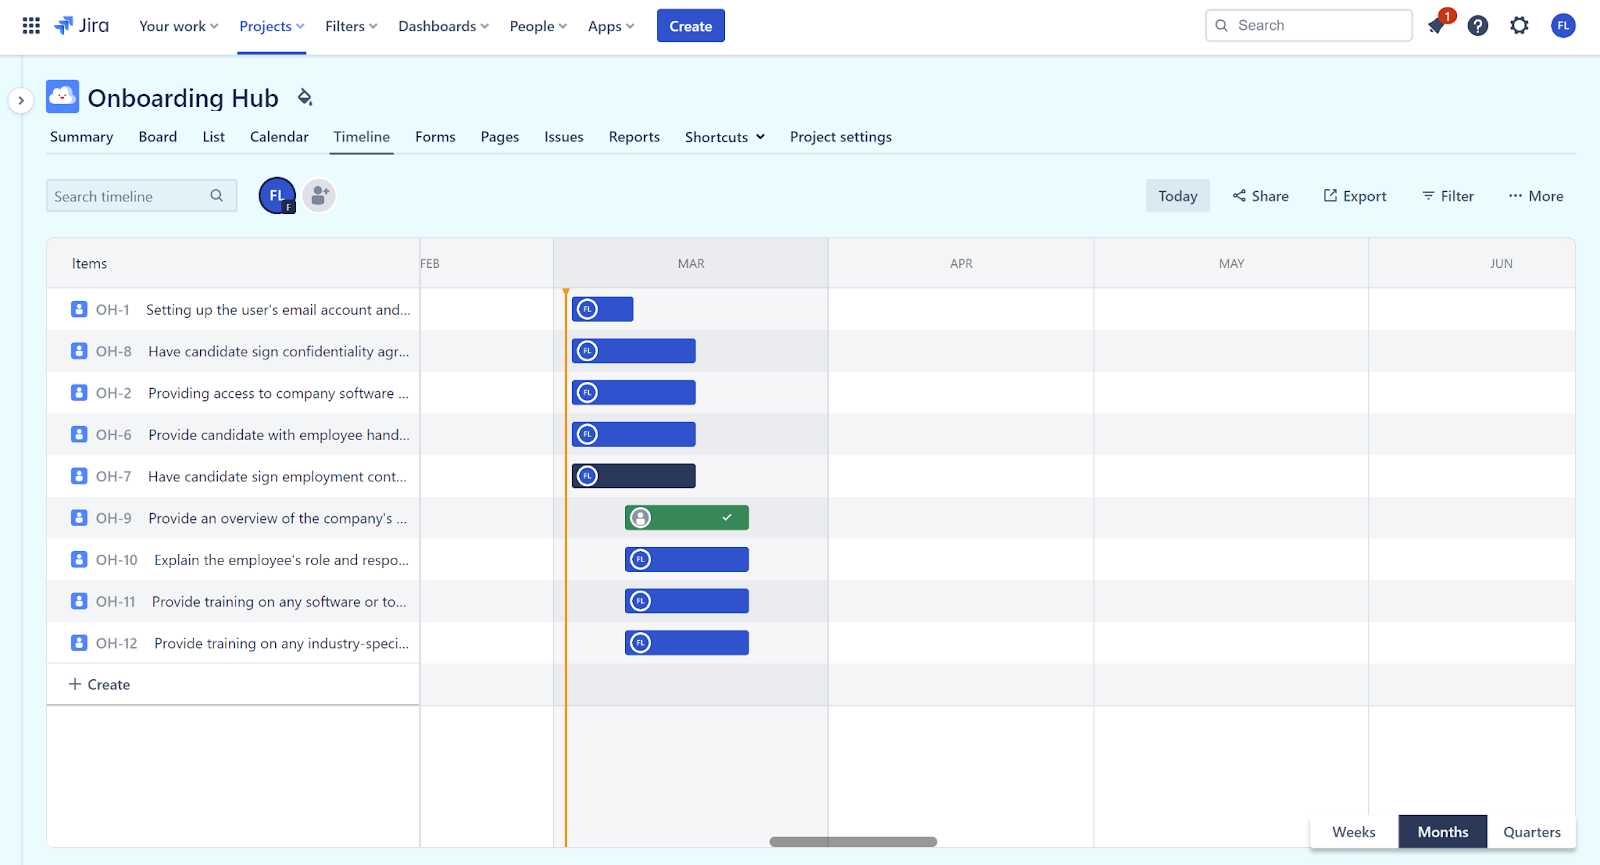
Timeline Feature for Onboarding in Jira :
The timeline offers a visual representation of the onboarding process.
You can:
- View Weekly, Monthly, or Quarterly Timeline
- Share with stakeholders and HR team members
- Export the timeline to include in HR reports
- Filter by status, date, assignee, priority, etc
A timeline for a project of onboarding in Jira showcases the duration of each onboarding task and how they overlap with other tasks like the completion of employee documents.
Forms for Onboarding in Jira:
Jira offers customizable forms that can be used to collect information from new hires during the onboarding process.
You can create relevant forms and integrate them into your onboarding process to analyze collected data. Forms are a leveraged feature to gather employee feedback and assess the onboarding process.

Pages for Onboarding in Jira:
You can link your Jira onboarding project with a confluence space or page, which might provide additional information about your company, or other resources for new hires like onboarding checklists, training materials and FAQs.
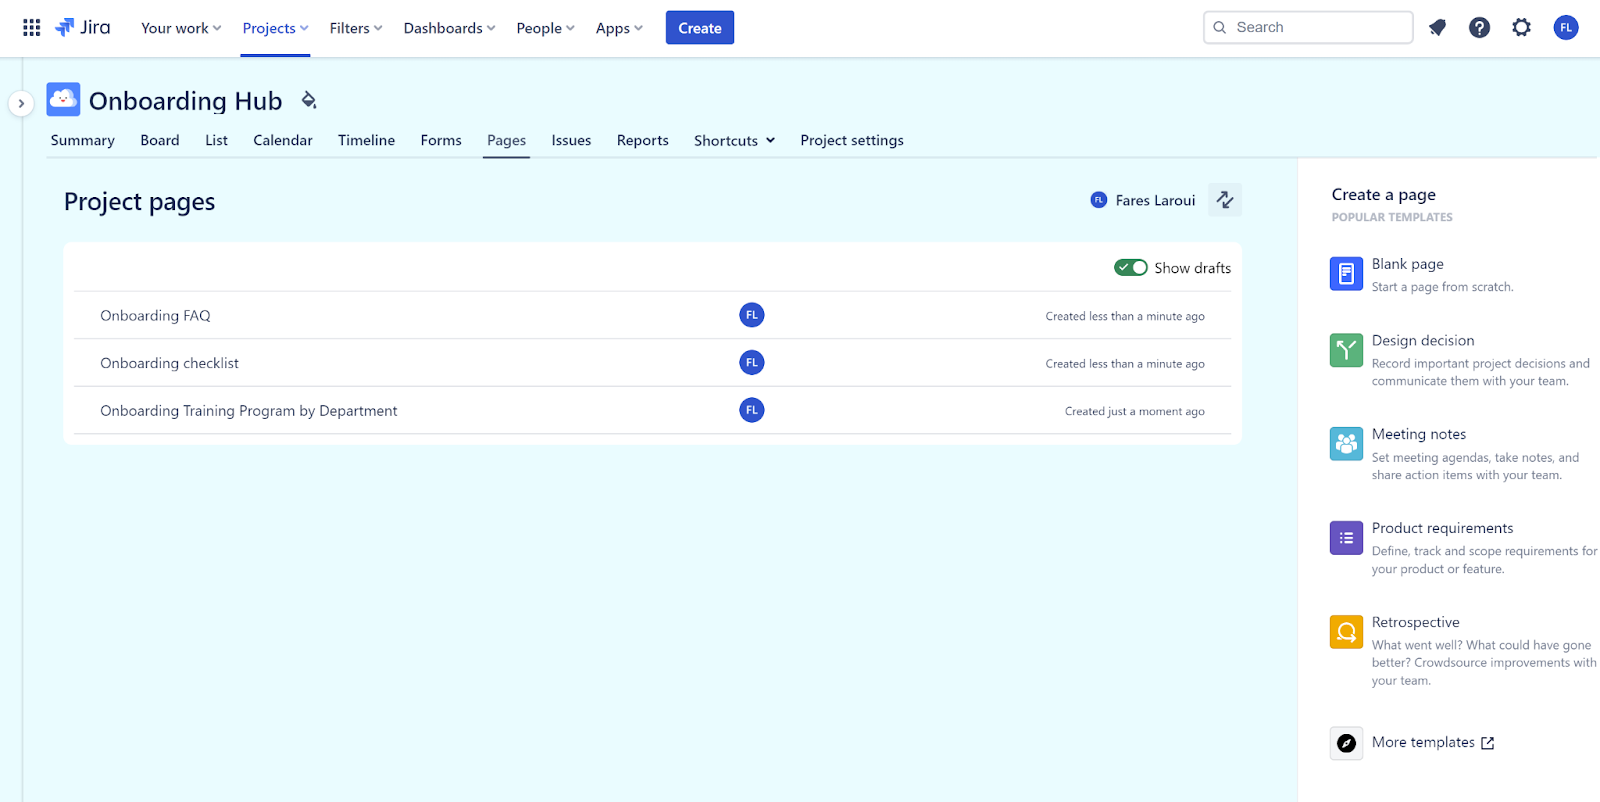
In the example below, we have created an onboarding checklist within Confluence. The document provides detailed tasks to perform during the employee’s first week. Additionally, the document contains a progress bar to indicate the onboarding step.

👉 Learn more about Onboarding in Confluence
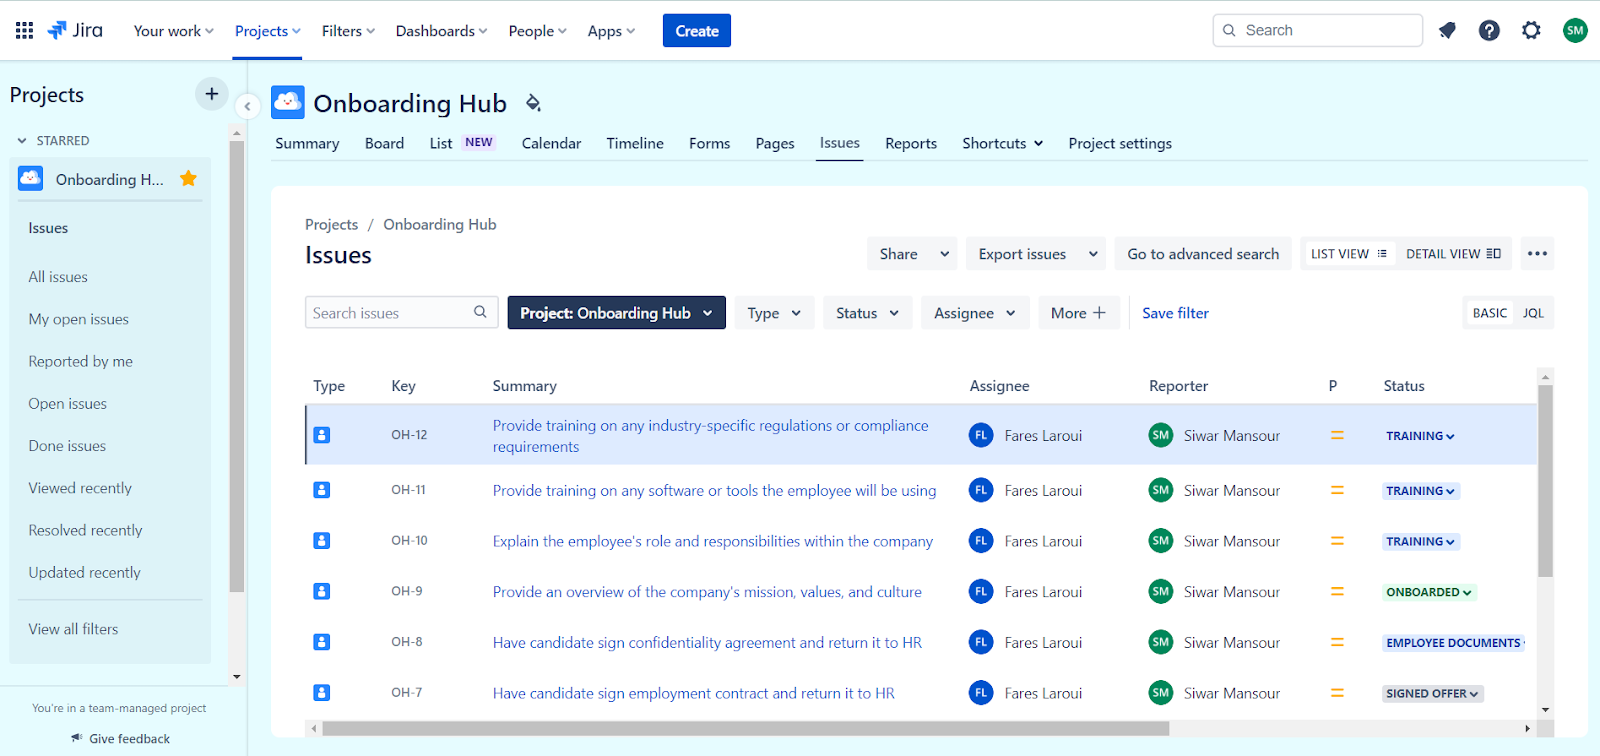
Issues for Onboading in Jira:
The issues view is a List of your onboarding issues that you can go through, modify, add comments.
Some key actions:
- Search Issues using the unified search function
- Filter by Project, Issue Type, Assignee, Status, etc
- Share Specific Issues with your teams along with a message
- Export Issues in various types: Excel CSV, Word, or RSS
- View Issues either in a list or a detailed view. The latter contains detailed issues and more specific actions.
Reports in Jira:
The reports section provides insights into your Jira onboarding hub. The reports section provides multiple report templates for analytics and data visualization tools. It can show metrics like completion rates, feedback from new hires, and time to be “ONBOARDED”.
Some key actions:
- Configure your reports
- Analyze data to identify the process’s bottlenecks for improvement
A report of your onboarding project can show the completion rate of each issue and highlight any delayed issues. Your HR team can thus pinpoint bottlenecks of the process and work on the adequate solutions.

Build and Tailor your Jira Onboarding Workflow
Now that you have an overall idea of the built-in Jira onboarding template, let’s dive into the creation and editing of custom workflows.
The default workflow includes four main statutes: Signed offer, Employee documents, IT provisioning, and onboarded.
You have complete control over the creation and management of issues, workflows, and transitions to mirror your onboarding process. Issues can be moved freely between statutes and can be added directly from the board view. To manage transitions in an advanced way, navigate to the onboarding template > Project settings > Issue Types > Edit workflow.
You will land on the workflow creation diagram where you can edit the workflow through a simple drag and drop, add rules and manage transitions.
Let’s start with Rules. Rules within Jira are an effective way to properly manage your workflow by restricting key actions with the right individuals (such as HR for example).

There are three rule types:
– Restrict transition:
Here you can restrict who can move issues along the workflow. Additionally, you can associate a particular transition with a specific status allowing only issues that reached the status to move through the workflow.
– Validate details:
Here you can verify that individuals have a specific permission to move issues. This means that your team can still use the transition but it won’t be valid until the rule is met.
– Perform actions:
These rules help you save time by automatically assigning issues and updating issues fields.
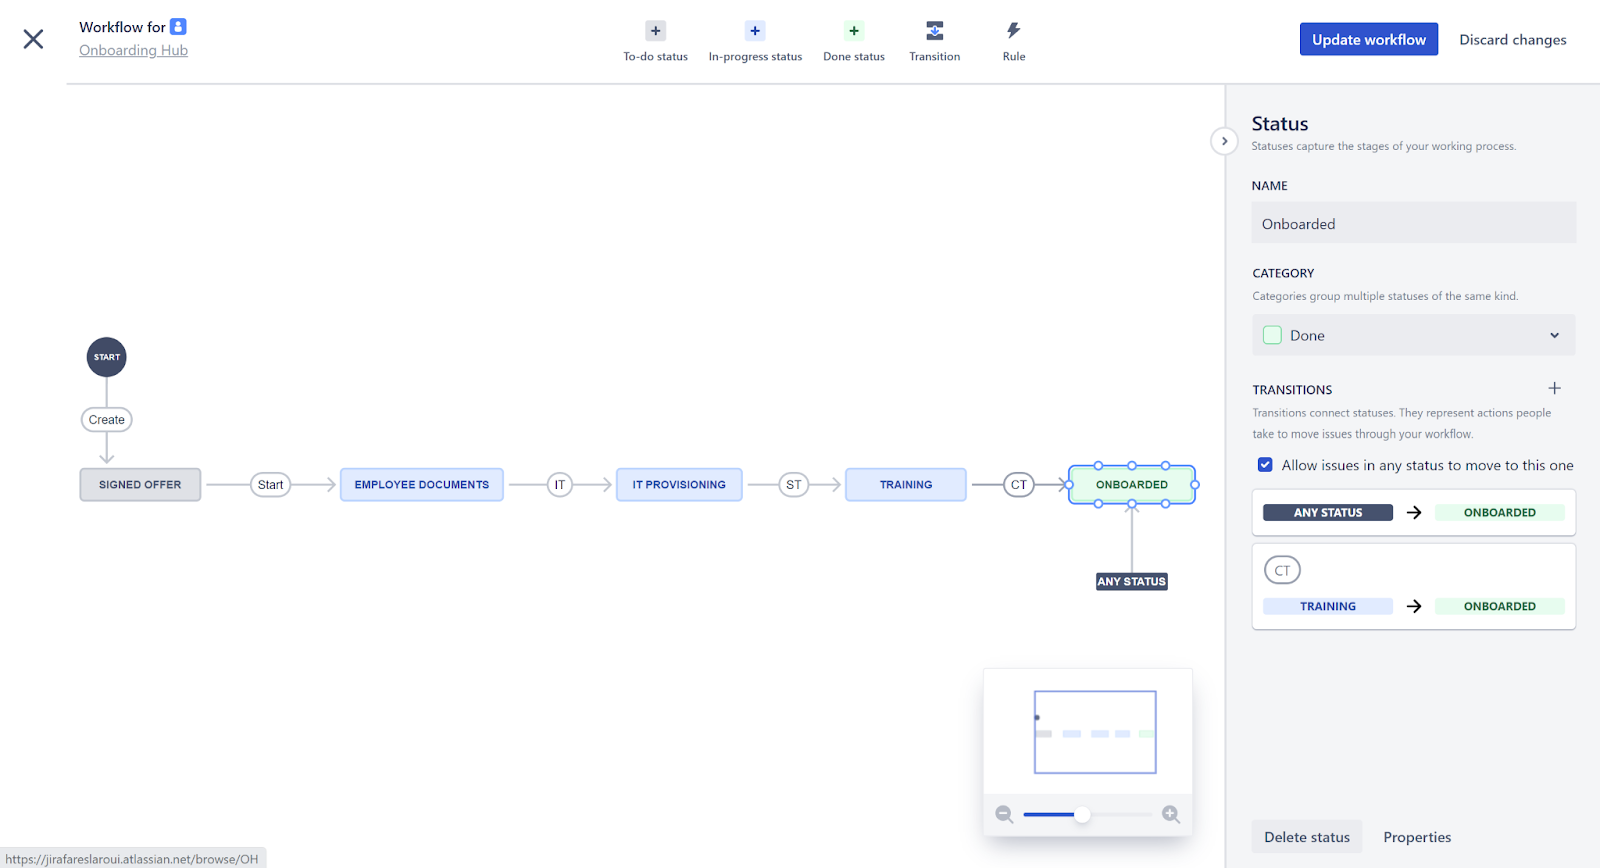
By clicking on each status, you can visualize the status’ category (be it To do, In progress or Done) along with the specific transition(s). In our example, the “onboarded” status is linked to by the Training statutes or any other given statutes depending on the onboarded individual.
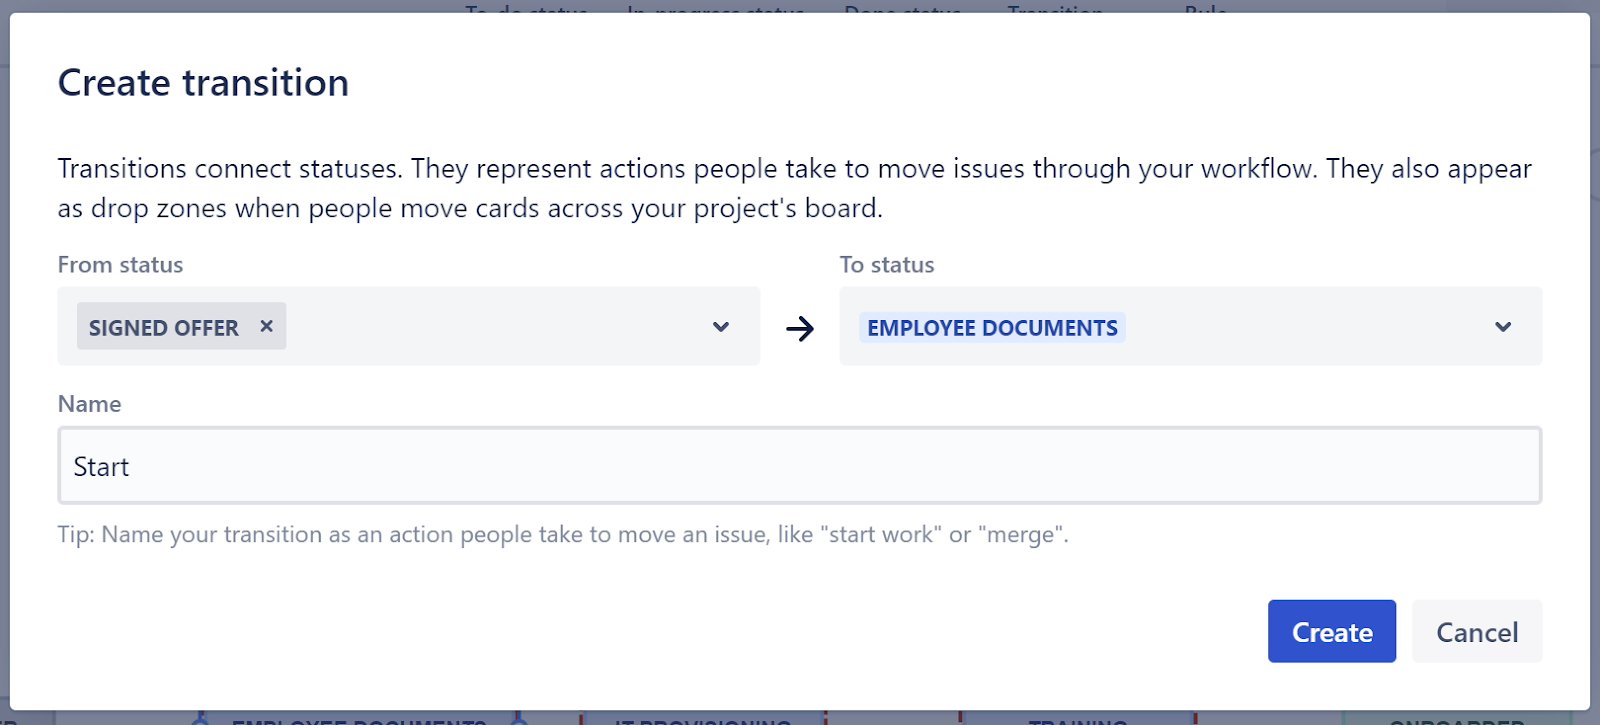
To add a transition, select “Transition” from the top menu. Specify both statutes you want to link along with a name. In our example, we specified the transition between “Signed offer” and “Employee documents”.
Measure and Optimize your Onboarding Process
More often than not, the onboarding process is subject to changes depending on a variety of factors. This is why it is important to measure the effectiveness of your onboarding hub within Jira. For this, you can use the reports section where you can find in-depth data about the onboarding process.
With this being said though, usage data within Jira are only a fraction of the data you need to collect. The next step is to gather feedback from both existing employees and new hires. Their feedback gives you perspective from both ends of the onboarding spectrum. You can use both usage and engagement metrics to fine tune your onboarding process.
By following these steps and leveraging Jira’s robust features, you can establish a streamlined employee onboarding hub that promotes your company’s culture and values. This ensures the success of your new hires and lightens the workload of your HR and management teams.